Wednesday 29 July 2015

Happiness is a HappySkin Lippie


Had Been meaning to post this review for more than a month now but like they say I put the PRO in procrastination . So what better day to post my review than on National Lipstick day. 

I first stumbled across the brand HappySkin at The Beauty Bar in Manila! 


The product display and packaging is what made me check out the counter. The display is a mix of soft girly colors like teal, pink and white much like its logo.

For a long time i thought it was a Korean brand but one of the SA at the beauty bar in Mall of Asia told me that its a brand from the Philippines. I swatched a few colors and for some reason I didn't buy any thing and flew back home.

Little did I know that I would be back in Manila this year that too when they were launching their 
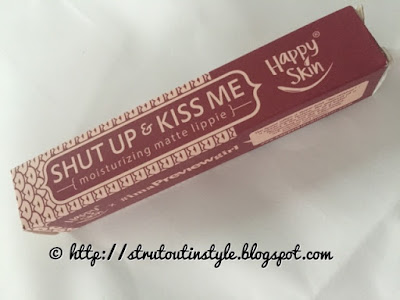
"Preview X Happy Skin Shut Up & Kiss Me Moisturizing Matte Lippie" .


My Lippie is in the shade "Hot Stuff" which is the red shade.

It is one of the two limited edition matte lippies that are part of  Preview Magazine's 20 year celebration.


   The brand says that each Shut Up & Kiss Me Moisturizing Matte Lippie contains Happy Skin’s signature shea butter and collagen combo paired with powerful Cupuacu Butter  which offers unrivaled  hydration, healing, and improved elasticity. 


   But first lets see the packaging.


   The Lippie in structure resembles the chubby stick by Revlon or Clinique. 


   But i love the fact that the Lippie stick has Pout prints all over it.


   And the gold detail at the bottom just adds to the richness.


  The product claims to offer three-fold "lip service": the trendy matte texture, the pigment of a lipstick, and hydration of a balm! One swatch on my had me sold on the Matte texture.


I compared it to the only other stick lip product i own : My Bobbi Brown art stick.


I know both shades are very different color wise but i swatched them together just to compare a few other features.


The Bobbi Brown art stick is supposed to give a creamy matte finish. If you compare the two swatches you can see that the HappySkin is much more matte.


When i cleaned the swatches with my bioderma sensibio h2o micelle solution the Bobbi Brown art stick came off immediately but the HappySkin Lippie did leave a bit of product back.


 After another round of cleaning with may Bioderma water the HappySkin lippie still left a very faint stain.


I road tested this baby many times. And its safe to say that the pigmentation of this Lippie is like a Lipstick also even though it looks super matte it is pretty hydrating. It is not long wearing but it can survive a light meal. 

With a couple of touch ups it lasts for the entire day.


Pros :
Matte
Does not dry the lips
Good color payoff
No bad scent
Reasonably priced
Sturdy Packaging

Cons :
The tip of the lippie stick becomes blunt after a while. {One simple work around this problem is using a brush to fill in the products around the corners.}

All in all I loved this lippie and will surely buy it again.

For those who wanna try it out it is available at Happy Skin counters at the Beauty Bar, Plains and Prints, Rustan's Beauty Source, SM Beauty or Watsons .

For on line purchase you can try the following links (I think they ship internationally also):

http://store.happyskincosmetics.com/index.php?id_product=70&controller=product

or

http://shop.beautybar.com.ph/makeup/lips/p3441295.html

Have a very happy Lipstick day ladies.
   
                                                              ---------- XOXO Pammy


Sunday 31 May 2015

Celebrate with The Body Shop - Part 2

The second part of my #CelebratewitTBS is a makeup product. 
It's the smokey 2 in 1 gel liner for eyes and brows. 
You get 2ml of the product for a price of 695 PHP. 

It has a tiny brush applicator at the top which works pretty well. So no hassle of carrying a separate brush for the liner. 


When I bought it I assumed it was smudge proof but there is no such mention on the product. I almost thought of exchanging it for something else.
 

But when I swatched it on my hand it looked really good. But it rubs off easily so for my smokey eyed ladies can use this to create that look. 


decided to road test this product a few days back. But it had smudged quite easily on my hand so to set it I used a dark eyeshadow. And it stayed on pretty well for a good 6-7 hours. 


 This is me after 4 hours. I think it stayed pretty well especially coz I have pretty oily lids and also the nasty habit of rubbing my eyelids. I haven't tried it on my brows yet but I don't think it will disappoint me. 

You might say that it's a tad too expensive but hey it's by the The Body Shop. It can never be bad right. 
M loving it so far. I hope you guys try it out. 
            --XOXO Pammy 


Friday 29 May 2015

Celebrate with The Body Shop Part 1

The entire month of May The Body shop celebrates 19 years in Philippines. So instead of doing a May favourites I decided to dedicate the last 3 days of May to 3 products that I purchased from The Body Shop Philippines. 

The first one is the strawberry hand cream. 

When it comes to skincare Our hands are one of the most neglected parts of our body.
There are very few ladies I know who bother moisturising their hands let alone buy a separate cream for it. 
I picked this up on a whim when I visited the store at SM Megamall. 
It retails at around 188 pesos for 30 ml.

The fragrance is similar to the rest of the products of the strawberry line. 

A pea sized blob is all you need for both your hands. Like they say 'A little goes a long way'.
I've been using this for the past few weeks and am loving it so far. 
The best time to use it is just before bedtime.So that while you get your beauty sleep your hands get some pampering too :)
Also after applying this if my hands get wet it feels weird an squishy. 
So I use it just before I sleep.
 
 Do try this out ladies and stay tuned for two more products......
                 -- xoxo Pammy 


Saturday 9 May 2015

The Beauty Junkee turns 6! Giveaway!

Congratulations to The Beauty Junkee on completing 6 years! 


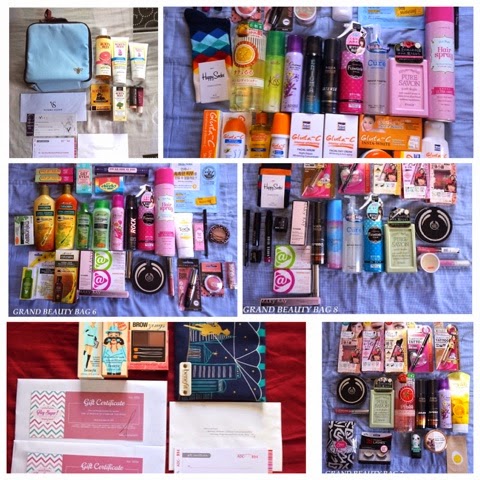
On this occasion there is a giveaway going on which features some of my favourite brands like Etude house, tony moly, the body shop,Burts Bees, benefit & many more. 


Look at the number of products guys! Woohooo!

Also it's for international readers as well so all my fashionistas from India can also enter.

All the information to enter the giveaway is given in the link below: 

The contest ends on May 15th so hurry up n enter ladies :-*

                      ---- XOXO Pammy 

Wednesday 8 April 2015

Quick n easy Easter nails

This year like every other I didn't have time to do my nails for easter. 

Luckily for me I had thought ahead. 


I bought easter water slide nail decals from www.bornprettystore.com

 It has Easter bunnies and Easter eggs!

Waterside decals are similar to the flash tattoos (refer my previous blog).

The steps for using them are: 


 1)Cut the decals you would like to use from the decal paper.

2)Place / soak the decal in water for about 15/20 seconds. 

3)Take the decal out of water and simply slide the backing of the decal away.

4)Place your decal into the desired position on the nail and dry off the water. 

5)You can then use a coat of top coat to seal your design. 

6)If you do not use a top coat...then you will find that your decals come off. 


I painted my yellow, pink and green for spring :P 


I pasted a pink bunny decal on my yellow nail and the yellow Easter egg decal on my Pink nail.


On my green coloured nails I used two more bunny decals.


For my pinkie I sugar coat by Sally Hansen in white colour for a French mani effect. 


One alternative is you can paint dots on the green nails.


I used these nail art pens by Hot designs that my friend sent me from Prague. But u can use a dotting tool or even a toothpick to create dots on your nails.

Rest of the products are: 
Nail art decals from www.bornprettystore.com

Sally Hansen hard as nails Xtreme wear - White on
Sally Hansen hard as nails Xtreme wear - mellow yellow 
Bourjois gel silicone texture - Rose cupcake
Maybelline ColorShow - Mint Mojito 
Sally Hansen Sugar Coat -200 Sugar fix 
Sally Hansen Top coat


Lemme know which one u liked. 

                 --XOXO Pammy 

Wednesday 1 April 2015

Flash tattoo nail art


In my February favourites blog I mentioned flash tattoos since then I've been using them a lot. 


These tattoos are fairly easy to use. 
1.Cut out the design of your choice peel off the plastic. 
2.Place the tattoo face down on area of your choice. 
3.Dampen the paper and press and hold it for a few seconds. 
4.As the damp paper slides off voila there's your flash tattoo.

You can buy these tattoos on www.amazon.com or www.flipkart.com or www.ebay.com 


I decided to try and use these tattoos to liven up my boring nails.


I had painted my nails pink and blue and after a few days they started looking dull.


I decided to use silver and black star shaped tattoos. And followed steps 1 through 4 that I mentioned above.


The only change here is I placed the tattoo on the already painted nails.


My nails pretty long so I used two stars on my thumb.


After Drying up the damp area surrounding the tattoo. 

I used a clear top coat to seal the tattoo in place. 


I used the Sally Hansen Topcoat on my nails .


Repeated the same procedure for the rest of my nails. 

All my fashionistas, yes I know about water decals for nails. 
But getting the water decals in Mumbai is a hassle so these flash tattoos are an easy alternative. 


So wipe off ur tears ladies coz now u can have bling on ur nails in minutes.

M planning to do an Easter nail art using water decals. Lemme know if u guys wanna see a blog about it.

Till then keep smiling & bling up ur nails.

                       ----XOXO Pammy 

Friday 27 March 2015

Product Review - ANNY Polish Corrector

Colouring outside the lines is what I've been doing since childhood. 
It's cute when u r a kid! But when the same kid grows up n applies nail polish like 5 year old using water color it's a no no. 
Not all of us would wanna get our nails done in the salon always. 
ANNY Polish corrector is a Salvation for messy people like me.


I picked it up at the SM Store in Manila, Phillipines.
It looks like a felt-tipped pen and the tip is shaped like a cuticle pusher. 
The other end of the pen contains 3 extra tips. 

In most of the DIY manis that you see people say that if you want a nail color to POP apply a coat of white first and then paint the color of your choice. 


Problem with this is when the coat of white peeks out below the actual color.


After using the Polish corrector my nails are much cleaner. 


Some might say why should I spend money for such a product. I can suggest two cheaper alternatives.........

1) Ear bud- dip you cotton bud in Polish remover and clean up the area around your nail .
Problem here is the shape of the cotton bud doesn't allow us to clean the crevices in the sides of the nails.

2) Tooth pic / cuticle pusher - Cover tooth pic / cuticle pusher with cotton and dip it in Polish remover. 
Problem in this case is if the cotton is too wet it might fall on the good part of the painted nail. If the cotton gets too dry fibres might get stuck to the nail.


All in all I am pretty happy with this product and would surely recommend it to you guys. 


Also for the ladies who wanna know what colors I used for my mani 
Sally Hansen Xtreme Wear - shade 300 (White On) 
Bourjois So laque glossy - shade 06 (Adore-bleu) 
Maybelline Color Show- shade 212 (Hooked-on-Pink)

Keep smiling n keep painting ur nails! 
       
              ---XOXO Pammy